
My DIY heart *finally* knows the feeling of a dramatic makeover!

My parents and I went to Goodwill one day two weeks ago (completely not looking for chairs) only to find this beautiful Louis XVI chair (leaving with said chair.) AND it was marked down - to $5! FIVE DOLLARS. The frugal part of me was simply over the moon. I didn't even know the chair was marked down until I got to the register (it had a $10 price tag - still a deal.) A lover of Goodwill, I will be frequenting there more often because there was also this **fabulous** sofa that I didn't want to pay $75 for, but totally would have paid $37 for. It was gorgeous. Just like this, but an awful green color. A product of my future dream house for sure after a little makeover.
Anyhow, onto the makeover.
I should probably first say that this is my first time making over a chair. There are probably things I could have done differently... but now that I've done one, I know there will be a next time to make those changes!

Then we sanded down the paint a bit. We ended up spray painting it (using Rust-oleum Ultra Coverage in Satin Ivory Silk.) I'm not sure how smart spray painting is... but they appear fine (and even weathered a trip from Texas to Oklahoma.) The sanding helped to make sure the paint would stick.
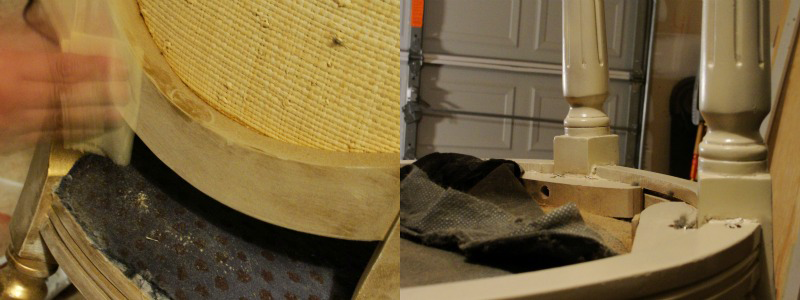
As I said, we didn't take off the cushions - we simply stapled the fabric I bought over it. After working with the chairs a bit, I actually think they had been made over once before and done in a similar way that we ended up doing them. We hot glued the braided cord around the edges. Originally we had bought a more rope-like cord, but being the first-timers we are, we improperly measured and didn't get enough. And then could not find it again at any craft states on the other side of the border! Ugh! But I ended up liking the braided more than I thought.

Voila! Can I just tell you how much I am in LOVE with the pattern? I saw it at Joanns and could not stop smiling. I just love all the colors so much! I unfortunately didn't get the name of it, but I know it is a Waverly Fabric. The braided lining we got at Hancock Fabrics. Oh and best thing about my chair is that I didn't get one, but TWO! They actually had 4 at the store, but I settled on two to accommodate the living space I have. Also, I have no idea why the carpet looks so mustardy in the second picture...
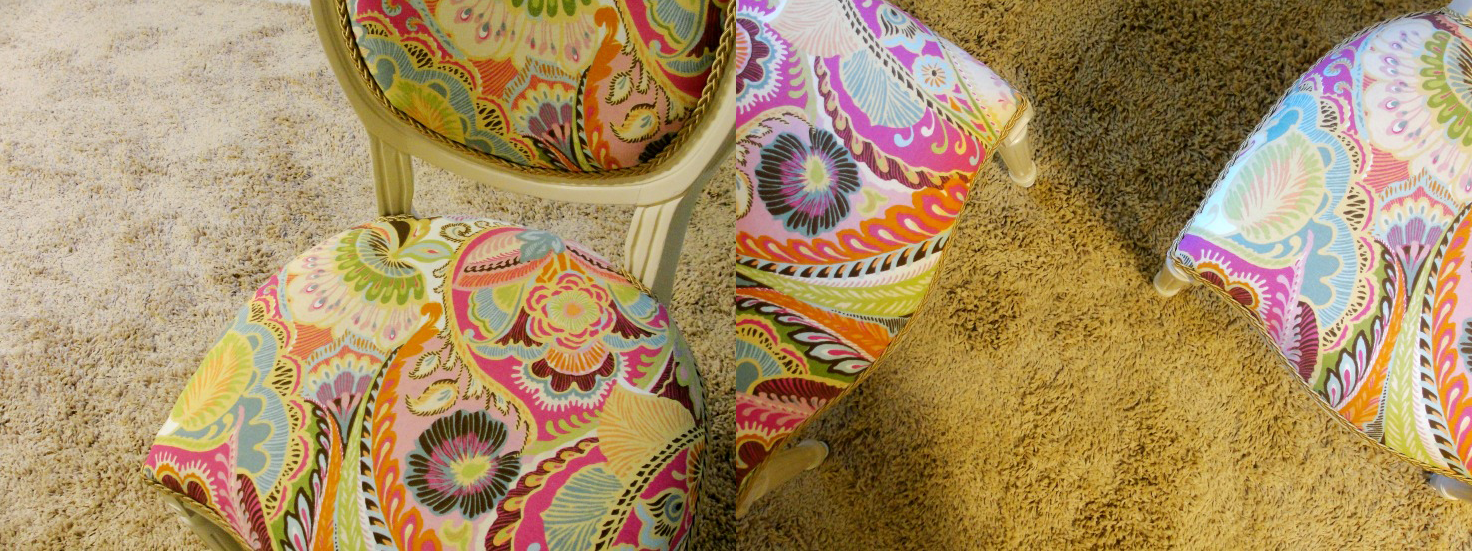

I paid $10 total for both chairs, about $19 for all the fabric (twas on sale!) and about $25 for the braided liner (oof.) But overall I consider $54 a good deal for these super cute chairs.
Have any tips for the next time I go on a re-do adventure? Let me know!
This is SO adorable! I've been wanting to find some chairs to redo for our house office and living room! Awesome job! I need to check goodwill more often.
ReplyDeletethese are darling! i bought two chairs for $5 each months ago, but I've been too chicken to work on them. thanks for inspiring me to go for it!!
ReplyDeleteVery cool Erikah! Very very cool!! im in love with that chair!!
ReplyDeleteThank y'all!
ReplyDeleteAmanda - I can't wait to see how they turn out :)!
Thanks for the tips for redoing a chair. The before and after make it look like a completely different chair.
ReplyDeleteIf this is your first transformation , I can not imagine how good will the next. Congratulations!
ReplyDeleteWhat a beautiful transformation. It is so elegant, I love it!
ReplyDeleteSo cute! love the chair!!!!
ReplyDeleteFurniture Stores In Denver Area
Formal Dining Room Sets