Thursday, December 30, 2010

an RA forever

I enjoyed being a resident adviser in college.
As each year passes, I find that it was much more than enjoyment. I loved that job.

One of my first residents graduated this month. I saw her about two months ago and she already has an absolutely wonderful job lined up. Graduating a semester early, she's the first resident I'm seeing enter the "real world." I didn't know that that would resonate with me, but it certainly is. As I sent her a message congratulating her, all these memories of her as a freshman came flooding into my mind. I was very fortunate enough to spend more time with her during undergrad in other student activities. I feel like I really got to watch her grow up and blossom from an amazing girl to an outstanding woman.

I feel so blessed to have had such a job that allowed me to meet so many people. I loved connecting to all my residents and learning about their aspirations - and it's just an even more wonderful thing to see them come full circle, to see them fulfilling their dreams.

After I graduated I wondered if I missed out on something in the college experience. I was an RA all four years, always lived on campus in the residence halls. Thinking about it now (7 months after graduation) I can't imagine my undergrad any other way. Each of my communities had a distinctly different personality and to think what my life would be like without meeting and interacting with those 40, 50, or 60 students that year - I just can't. I now, more than ever, cherish those years I had with the young, brilliant minds. And luckily, it's a gift that keeps giving as I see them graduate and move on.

"Some people come into our lives and quickly go. Some stay for awhile and leave footprints on our hearts. And we are never, ever the same." - Unknown

xoxo erikah

Saturday, December 11, 2010

candlelogra

I really love the look of candle wax and how it melts onto different things.

I originally started this as an art project. For that reason, I didn't photo-document my steps, so I apologize for that now!
The final product cost me $3.20! We had the wood in our backyard. I picked out one I liked then drove nails we had on hand into the wood, pointy part up. I held a lighter to the tip of the nails to make the candles slide onto the nail easily. After that, it was just a matter of letting the candle melt. I did use a lighter to speed up the process and make sure the wax on the bottom melted well enough to hide the nails (with the exception of the orange candle, which you can probably tell.. I accidentally hit it with something and it cracked up the side, so I replaced it.)

I really liked the autumn colors of the candle and my mom actually ended up liking it so she's putting it in the house somewhere with her autumn decor (which we can still get away with because we live in Texas - woot fall-like winters!)

I will probably do this with different candles for my room in the future! I love the natural feeling it has.

xoxo erikah

Friday, December 10, 2010

not your typical craft project...

There is this hilariously cute, somewhat odd, YouTube video that my friend absolutely loves. It's called Marcel the Shell with Shoes on (WATCH IT!)

Marcel is such a precious little character that I couldn't help but want to remake him and gift him to my friend who adores him.

Introducing my version of Marcel:
The shoes were made out of white and pink polymer clay (I know they could be better...) It was my first time working with the clay, so hopefully next time it will be better. I just bought a bag of shells from Hobby Lobby and picked the one that looked most like him, and the lettuce looking part behind his eye is just neon green tissue paper.

Super simple and I thought he turned out too cute!
xoxo erikah

Monday, December 6, 2010

earring stud frame

So I love slash am addicted to stud earrings. Unfortunately, I'm also not the best at organizing them, often losing an earring, losing a back to one, or breaking them. I really wanted to make a holder that I liked the style of and that would help me stay organized - so this is what I made!


This is a bulletin board-style frame I bought at Hobby Lobby (originally $14.99, bought it on 50% off sale.) I was originally going to use a picture frame but they were about double the price, so I opted for this instead.

It originally had a back like this:
I took the screws out and essentially left it barebacked. I hot glued the cushion-y part in place, so that the backing was secure when I put the earrings on it.

Mine looks like this on the back:
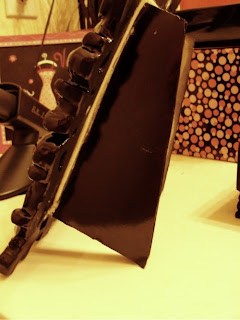
I made two stands out of thick foam posterboard & spray painted them black with spray paint we had on hand. Originally I had did this because my intentions were to poke my earrings through the cushion & cardboard and then secure the back with my earring posts... however, it did not go over like this. I just couldn't manage to get the earrings through the backing even though it was thinner than when I bought it. If you can do that, then you could probably do this step and make it look prettier (I get excited easily when crafting and therefore rush the process - a downfall, I know.) If you're like me and can't quite get it, then I'm sure you can skip this step entirely and just leave the original back frame on.

Since I couldn't push my earrings all the way through, they're definitely stuck into the cushion enough that they won't budge, and I just put all my posts in an old organizer I had.
Anyhow, I like the way it turned out. I really like that I can leave it out and will hopefully not lose many earrings now!

Very simple craft today :)