Monday, June 25, 2012

WHEN I GET BORED,

I house shop.
As if I'm going to buy a house anytime soon.
And if you don't think that's weird, you should know that I have the Realtor app on my phone, so this house hunting typically takes place while I'm in bed. I don't even know where I'll be a year from now, and even then I highly doubt I'll be shopping for a home... But that's not the point!

These are just a few of the houses I've found yesterday or today and loved for one reason or another.

5 Thames Court, Columbia, South Carolina
Look at how CUTE this little house is! I really like the living room set-up, particularly the bookshelves and mantle. Better yet, I love the trees surrounding it and the backyard looks like it's a nice size. It just seems very open, yet intimate and warm. Mm.

225 Wells Pointe, Ashland City, Tennessee
I AM IN LOVE WITH THIS HOUSE. Like, completely over the moon, out of the ballpark, in love. The deck and patio are so. stinking. cute. and the architecture inside the home is really beautiful. It really has this southern comfort feel on the outside with more of a loft feel on the inside. 225 Wells Pointe, just give me 5-10 years will you?

17221 Steger Lane, Manor, Texas
I've always been a girl after a house to remodel, and this seems like it would certainly be the case. There is such a charm to this house that draws me in, a lot of potential! While I don't particularly favor much on the inside of the house, the ceiling in particular really draws me in. And the back porch area? I am just a sucker for porches. Cute fixer-upper.

I just really can't wait to be permanently somewhere.
xoxo e

Sunday, June 24, 2012

SUNDAY SNAPSHOT: THE COLOR RUN

This weekend has been a doozy (as it always is when my schedule is different than the norm.) A friend and I decided to do The Color Run in Tulsa and my family drove up to be part of my first 5K experience!

There aren't many DQs in Oklahoma, but we made sure to
find one on our way to Tulsa!

My runner number and the packet of colored powder
they give you to use at the finish line.


The colors Duke, the colors!


It was a pretty fun time, and I'm excited because my parents said they're on board to do The Color Run in Austin in February! Good times, good times.

xoxo e

Tuesday, June 19, 2012

DIY "SNAPBACKS"

So I have this thing for "snapbacks"/flat-billed hats.
But my wallet, well, her love for snapbacks isn't as deep.
She actually may or may not call them "setbacks" instead, considering they're usually $20-35, and can run up to even the $60-80 range. And that's just a lot of money... for a hat.

BUT ALAS.
The Dollar Tree sells hats. For $1.
Originally, I bought this cute pink one (cute being the color, the hat not-so-much.) The hat is more of a traditional ballcap, but the bill is completely *manipulatable (*blogger didn't spellcheck that, so I'm assuming that is a real word. Which. Color me surprised.)

My original plans were to write some fun word on it. Kind of in the spirit of:
Only not those words.
Because I'm not a mancub.
 And this is about how well that went:
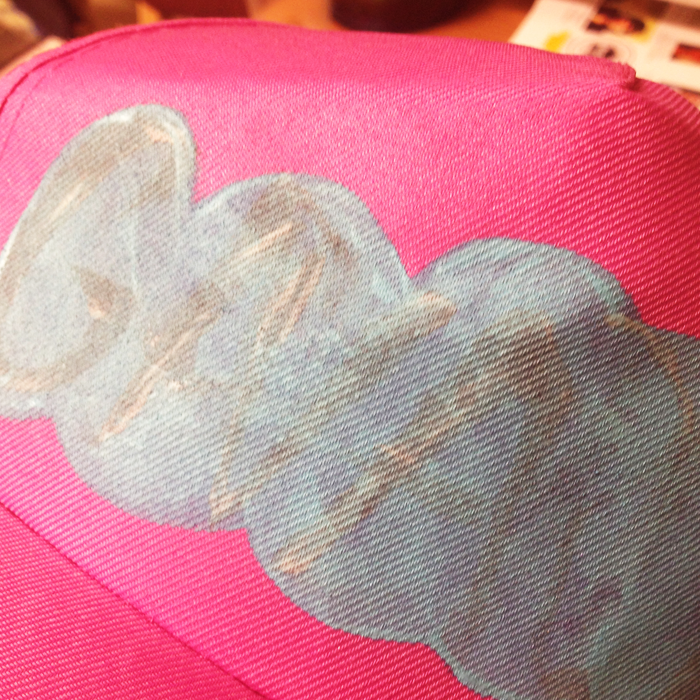
just. what. I can't even.
And then I didn't know what to do to cover up this mess.  And then! I remembered! I had seen a cap with a lovely floral bill:
I mean, I'm not a Bulls fan, but still.
And fabric - fabric I had. Specifically, I realized that I had bought this neat floral pattern recently from Hobby Lobby on a whim, just because I liked it. It looked like it would do the trick for the project. Also, for those that are curious, I searched the name I found on the fabric, but couldn't find a link to provide for you. It also seems to be unavailable on the Hobby Lobby website - sorry!
I cut the fabric to 8.5 x 11 (a sheet of paper was the only real measuring tool I had handy...) and folded and hot-glued one edge.


 The fabric on my hat was actually going to be reverse from the Bulls hat because I had to cover the mess-up I had made. I started by gluing the folded edge I had made on the hat, on top of the bill.


After that, I slowly cut, folded under, and glued the sides. Because the hat is from Dollar Tree, I don't think the stitching on both sides is centered. I made the fabric touch the ends of the bill, and then followed as close to the stitching as possible.

One side down, creeping up the other.
The top was the hardest part because I seriously lack cutting and wedging skills (is that even what it's called? I don't even know the name, that's how much I suck at it.) And to be honest, I don't know that there was a real method to this part. I tucked and pulled and folded and glued until it looked right. If you really wanted to, you could probably pop off the button atop, but that would create more work for me (more work that I would probably mess up) so I didn't go that route.


Voila!
Afterwards, I thought it seemed a little naked, so I added a faux-pearl lining.  I mainly glued the edges, to make sure it was secure.

After some thought, and some texting consultation from two friends, I decided to do a double-line trim as opposed to just one. 


And there you have it! Hat One. 
You didn't really think I would do a tutorial for just one hat did you? I mean, they were a DOLLAR!

The second hat was much more in the spirit of my original ideas. When I went back to get another hat, they were out of the pink and mint colors I liked best, so I just went with black.


 Again, just bend the cap out.


Obviously a cheap frugal person, I used what I had handy, which was some white acryllic paint and metallic blue washable paint.


I was shooting for a kind of electric blue color to pop off the black.


I wanted a hat with a kind of 80s/90s electro feel. I settled on Blaze ITC font, and the word 'gnarly.' Yes, gnarly. Keep your eyes peeled, "mondo" and "tripendicular" coming to a hat near you soon.


I started to sketch out the letters. One of the biggest mistakes made is to start and write like normal, often running out of space and not being able to complete the word. Start at the beginning, then switch to the end, until you arrive at the middle. This allows you to adjust accordingly as you go.


If you plan on doing this, I would almost advise against a black hat because it will take a lot of layers to create a more flat/one-color image. On a light colored hat you could also probably use some kind of heat transfer to perfect the look, but that sounds more complicated than what it's worth to me.


I've actually done the latter DIY before, but on the mint/aqua-colored hat I talked about earlier. Using black paint on a colored hat turned out a lot better in my opinion.


So, overall, 3 hats for $3. WHOO.
xoxo e

Monday, June 18, 2012

NEW BEGINNINGS, OLD PICTURES

Well if you haven't noticed - "Collegiate and Crafty" got a facelift! And a name change.
I am just in love with the bright, poppy colors. It feels so much more me. Bold, yet feminine (or at least, I'd like to believe.)

And the name change. Well. I never felt super tied to Collegiate and Crafty... it just seemed like something kitschy that matched what I was doing. I mean, I'm still doing the same things, but it just seemed like a name that wouldn't grow with me. Also, I've been contemplating an Etsy shop, so I wanted to find a name I could use on multiple platforms (I changed my Twitter name as well.)

If you're unfamiliar with the phrase "honor bright," it is from D. H. Lawrence's short story Rocking Horse Winner and basically means "honestly" or "I promise." I've always had a certain attachment to it.

Now on with the post!


I don't believe I ever posted pictures of my new place, so I took some quick snapshots to do so! The place certainly isn't done yet by any means (but you would think it would be, after living here for a year...) but these are just some of my favorite things.

Flowers in mason jar, made by mamacrafter.
Southern things tray I blogged about last June.

Wreath, also made my mamacrafter!
The jar is filled with goodies for Alecks, and the
faux-old booklet is from TJ Maxx.

Frames by the entrance. 

A year later, and the top frame is still plaguing me. HALP.
Also, this cute, yarned 'E' use to be in the top blank space,
but it tragically fell & shattered one night. Sigh.

Bought this globe & stand for $1 at a garage sale - color
me elated! Just painted the base cream to match the room.

This is my little owly, bought on sale at Hobby Lobby
around Thanksgiving. Love him.
But really, if you have suggestions for my other frame I really want to hear them. I'm tired of looking at a blank frame. Speaking of blank frames, someone please tell me I'm not the only one who buys beautiful frames only to never find the right picture for them?! Last year our fence blew down and so we had a ton of wooden planks to get rid of - enter Talia Christine's beautiful DIY wooden picture frame. So I made the frame last summer. Here's what it looks like today:

Yep. Still empty. One of these days I'll hang pictures...

Crossed fingers a lot more crafting to come this week.
Hope your Monday is lovely!

xoxo e

Friday, June 1, 2012

MIA

It has been quite some time since my last update.
Life has been an absolute whirlwind the past couple of months!

But, alas, it is summer and I have finally (well, for the most part) caught up with the clock.
Will post soon.

xoxo